We’re all spending loads more time at home and at this time of year it’s great to have some activities that you can do as a family, safe and warm indoors, that keep the kids interested and which just might inspire the next generation of STEM masters!
We’ve compiled a few ideas below that you could try:
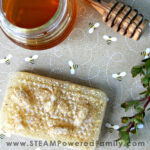
Making soap

This one is quite appropriate for the current environment, but might make nice holiday gifts to share too! It’s an American recipe but we’ve included conversions of the quantities which hopefully make it easy to follow for all of our customers!
- Ingredients:
- ½ pound glycerine soap base (we prefer clear but others work too) (approx. 227 g
- ¼ cup cream or goats milk (approx. 60 mL)
- 1/3 cup honey (approx. 70 mL)
- 1 tablespoon coconut oil
- 1/3 cup oats, ground, reserve 1-2 tablespoons (approx. 60 g)
- 1 teaspoon sweet almond oil
- Tools:
- Spray bottle of rubbing alcohol
- Soap mould – any silicone former will work but you could use plastic tubs and cut your block into bars once set.
- Sharp knife & cutting board
- Microwave safe bowl & microwave
- Food Processor
- Method:
- There’s a great video on The Steam Powered Family website where we found the recipe, that shows you clearly how to make the soap.
- Cut the glycerine into squares, pop into your bowl and microwave on 30 second bursts until melted.
- Add the coconut oil, stir, add sweet almond oil, stir, add honey, stir, add cream, stir!
- Blitz the oats in your food processor (you could do this a little at a time with a pestle and mortar) until you have a fairly fine powder.
- Add about 3/4 of the oats to the soap mixture. You could also add some cosmetic glitter or a couple of drops of essential oils at this point.
- Spray the bottom of the mould with rubbing alcohol as this prevents bubbles forming.
- Sprinkle a few pinches of oats in the bottom of the mould, and then gently pour the soap mixture in. Sprinkle more oats on top, then spray the top with more of the rubbing alcohol (we don’t want pesky bubbles!).
- Let it sit and harden for approx. 2 hours. Once it’s hard, gently pop the soaps out and store in an airtight container or sealable bag until you’re ready to use them!
Colour change fireplace pinecones

If you have an open fire, or a firepit of some kind in the garden, then these are great for the cold autumn/winter evenings. Obviously children should be carefully supervised by a responsible adult at all times when in the vicinity of naked flames.
When you toss the prepared cones in to your fire they’ll burn in beautiful colours until the pinecones are all gone! Prep Your Pinecones: (If you use pinecones you purchase at a craft store, you can skip this step.) If you’ve gathered pinecones from the great outdoors, you’ll need to bake them in a 200 degree oven for one hour to remove bugs and open up closed cones. Line a baking sheet with aluminium foil first, as sap will drain from the cones. Allow them to cool afterwards.
- Tools:
- Large bucket
- Tongs or slotted spoon
- Flame colourant – choose one of the following, depending on the colour flame you prefer (though most are common household chemicals, remember to keep out of the reach of children and pets):
- Yellow – Table Salt
- Yellow-Green – Borax
- White – Epsom Salts
- Green – Boric Acid
- Red – Strontium Chloride (found with aquarium supplies in pet stores)
- Method:
- Pour 1/2 gallon of hot water into the bucket.
- Add 1 cup of the colorant of your choice, and stir until dissolved.
- Add pinecones to the mix. Be sure to add only as many as can be completely covered by the solution. Soak for 8 hours or overnight.
- Remove the pinecones and set on newspapers to dry completely – at least 3 days.
- Now your pinecones are ready to burn! Simply add them (one at a time) to your fireplace and watch the colours appear.
- Tips & Precautions:
- You can make several batches of different colours, but don’t mix the colours in a single batch. Burn only one colour of pinecone at a time.
- Do not use coloured pinecones on cooking fires or BBQ grills.
- Always use common sense and caution with open flames.
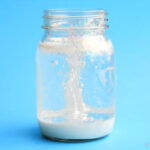
Snow Storm in a Jar

This one might be better for younger kids, but having said that I’m pretty sure that my 27 year old would love it as much as I do! It’s super-safe and easy, and it lasts for weeks using things that you’ve probably got around the home.
- Tools:
- Baby oil
- White paint
- Water
- Glitter
- Alka Seltzer
- Method:
-
- There’s a great video on YouTube from OneLittleProject.com:
-
- One cup of baby oil (approx. 240 mL) and 1/4 cup (approx. 60 mL) of water, but you’re going to want to adjust your liquids based on the size of your container.
- Mix enough paint with your water to get a thick, saturated colour and stir it to ensure that the paint is evenly dispersed throughout. You REALLY want to be able to notice the water when it “storms” into the baby oil.
- Layer the white water on the bottom and then add the baby oil gently overtop. Add as much glitter as you can handle (loving this!).
- Drop the whole Alka Seltzer into the jar to start your snow storm! It’s might be a bit hard to see in the pictures, but the Alka Seltzer sends the water cascading up in waves and bubbles, with the baby oil slowing everything down so you can observe the storm in slow motion.
We hope these give you some ideas for activities but we’d love to see the results if you try one of these at home! Please tag us on your posts if you share via social media!
Take care!


